Quick Start
Getting started
The box can be built with the following command (note that it takes a while as it installs many underlying packages) :
When running the Docker image ;
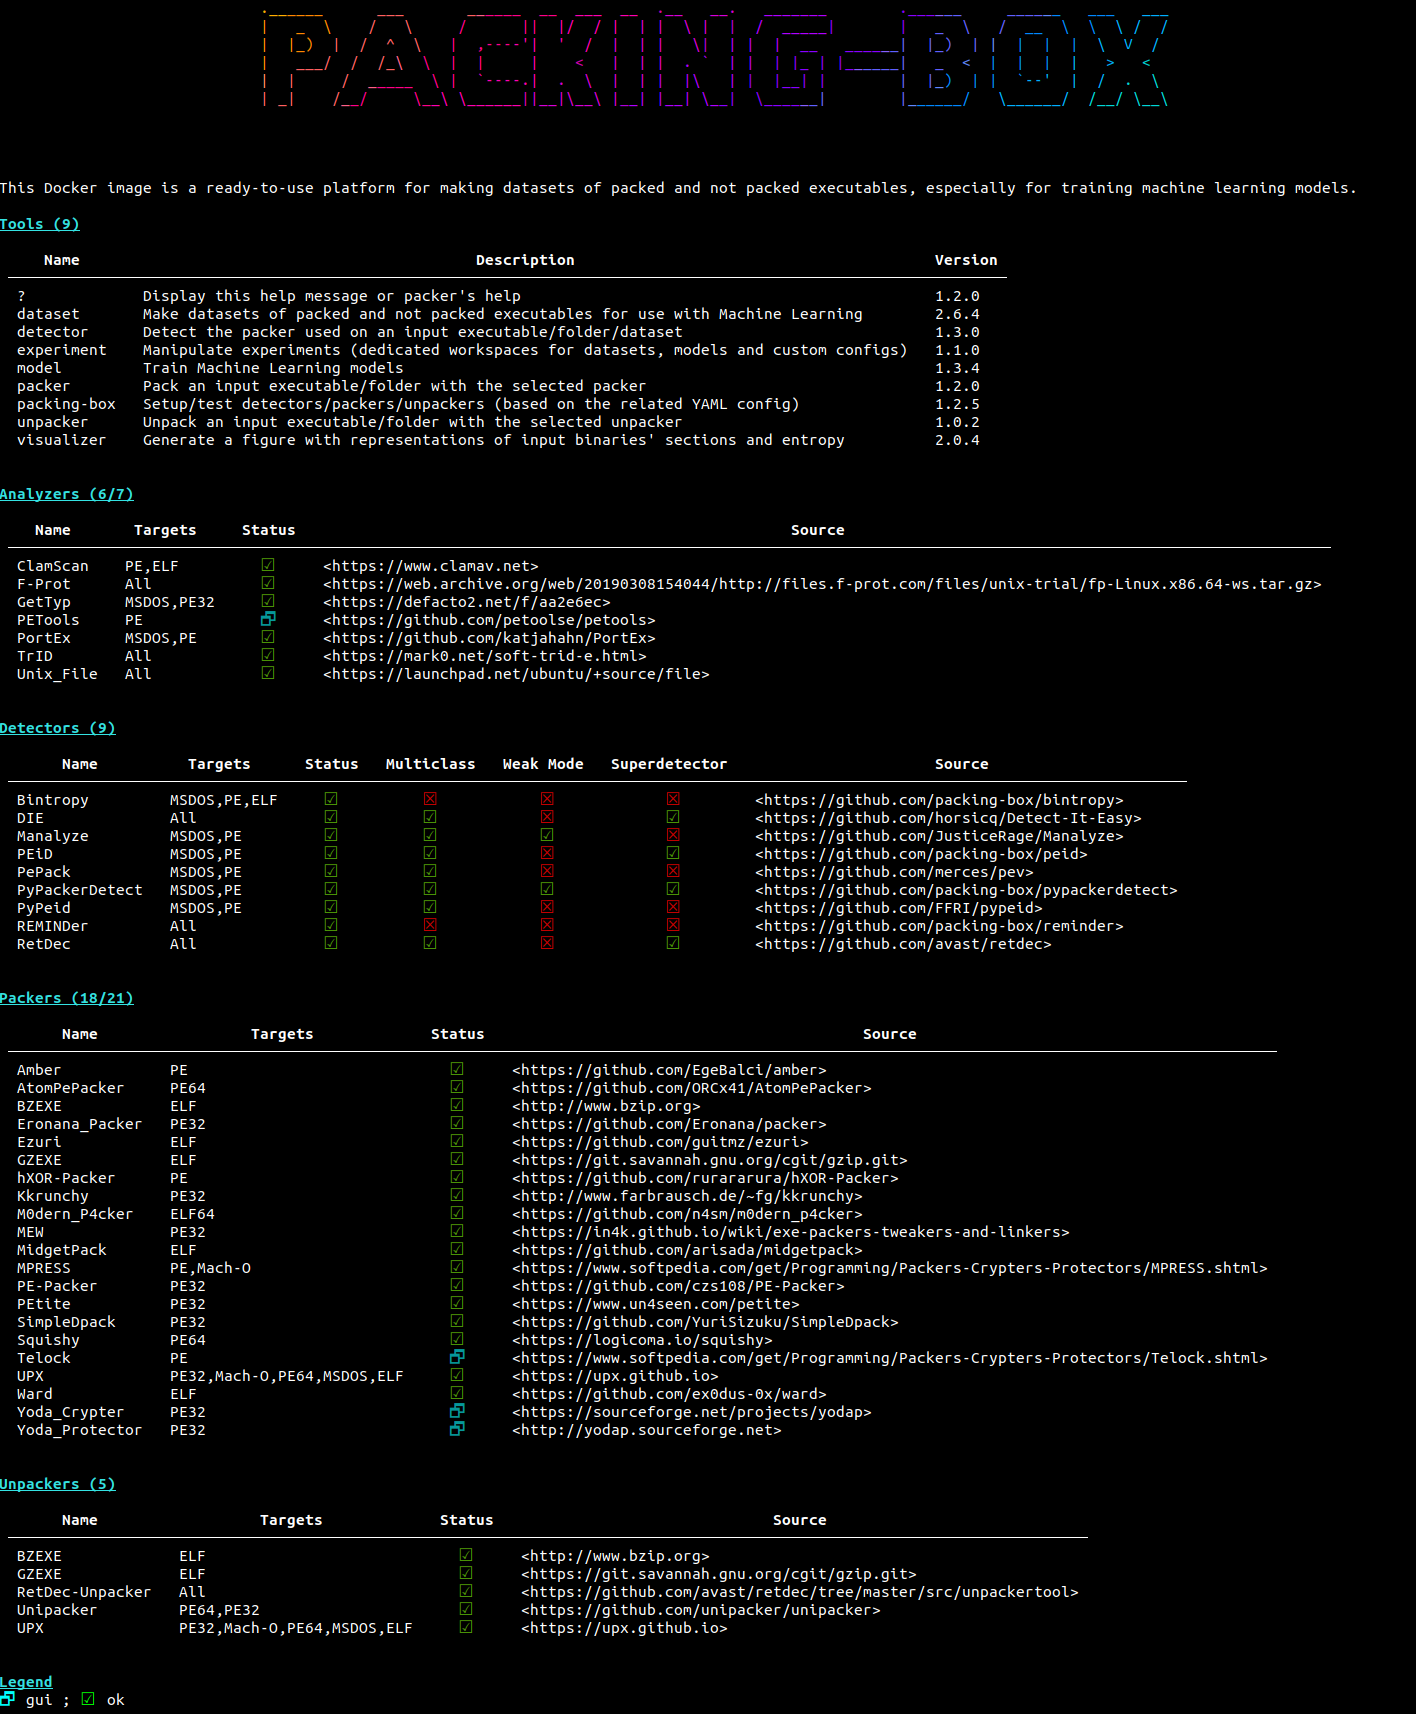
We are presented with a root shell that starts with a help message like this:
Getting Help
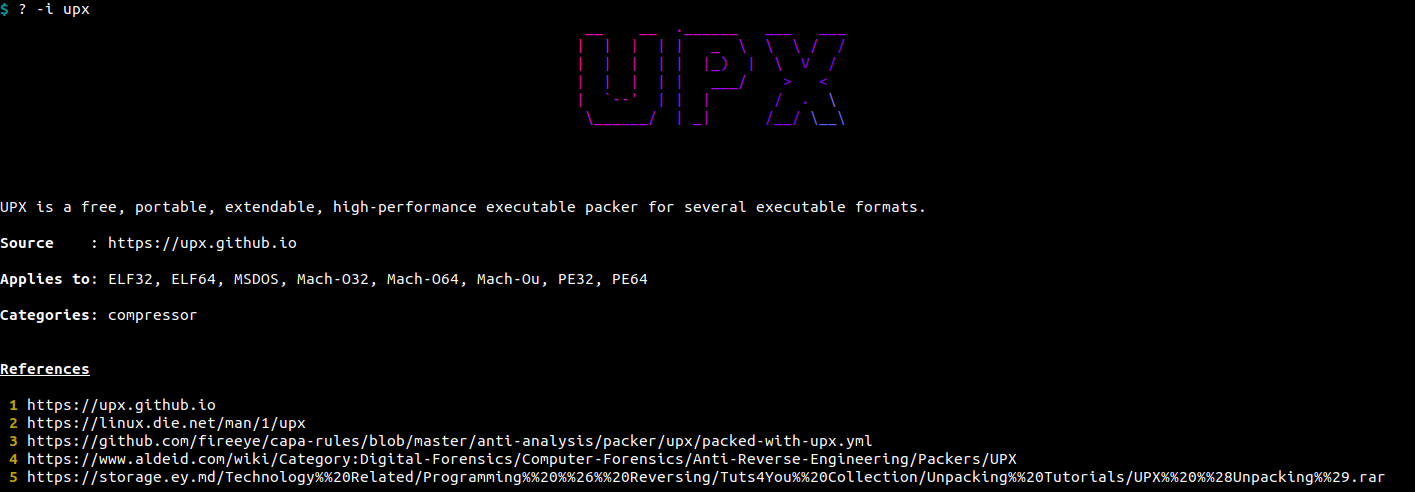
Help can be obtained by using the "?" tool. This will display the welcome message seen when starting it. It has an option -i ITEM / --item ITEM allowing to see the specific help of an item from the box.
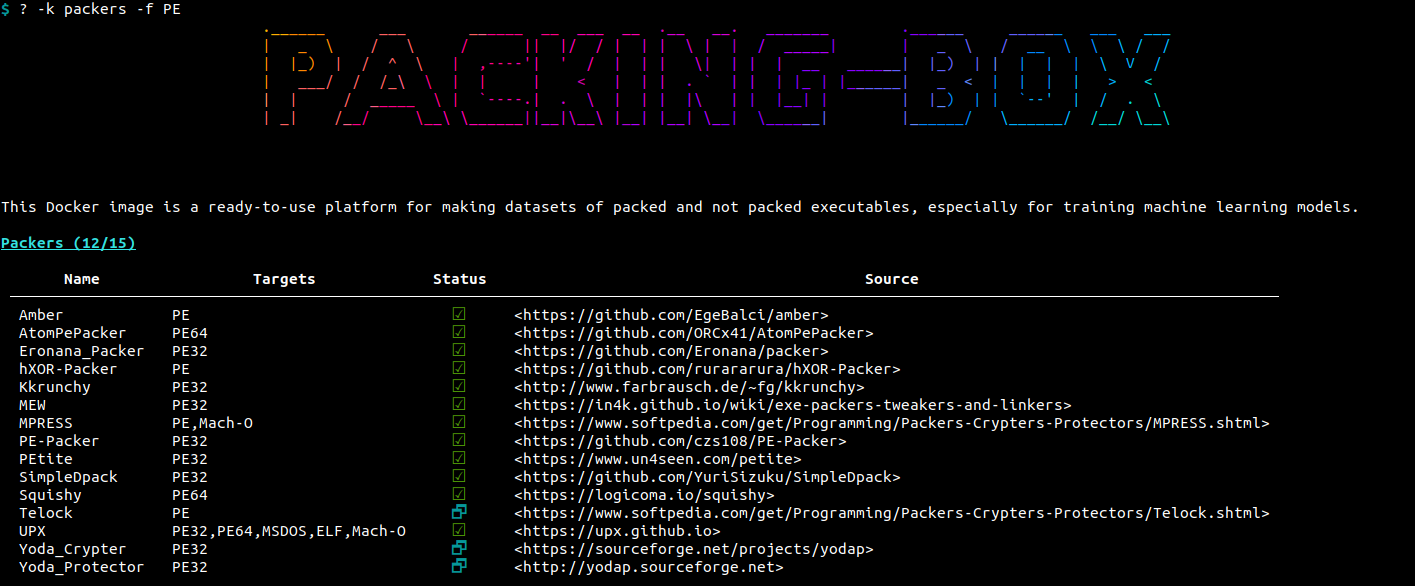
The help tool has also a -k {detectors|packers|unpackers} / --keep {detectors|packers|unpackers} option to only display specific classes of items. The same applies to formats with the -f FORMAT / --format FORMAT option. For instance, if we want to display packers for the Portable Executable (PE) format, we can type:
Items management
From the help message, the section named Tools shows the list of available tools. The main one is packing-box. It is aimed to install and test items but also to display or edit the workspace or even to configure options like the workspace's folder.
$ packing-box --help
Packing-Box administration tool 1.2.5
Author   : Alexandre D'Hondt (alexandre.dhondt@gmail.com)
Copyright: © 2021-2023 A. D'Hondt
License  : GNU General Public License v3.0

This utility aims to facilitate detectors|packers|unpackers' setup|test according to the related YAML data file.

usage: packing-box [-h] [--help] [-v] [-f LOGFILE] [-r] [-s] CMD ...

positional argument:
  CMD          command to be executed
    clean      cleanup temporary folders
    config     set a config option
    list       list something
    setup      setup something
    test       test something
    workspace  inspect the workspace

extra arguments:
  -h                    show usage message and exit
  --help                show this help message and exit
  -v, --verbose         verbose mode (default: False)
  -f LOGFILE, --logfile LOGFILE
                        destination log file (default: None)
  -r, --relative        display relative time (default: False)
  -s, --syslog          log to /var/log/syslog (default: False)

Usage examples:
  packing-box config --workspace /home/user/my-workspace --packers path/to/packers.yml
  packing-box list config
  packing-box list packers --name
  packing-box list detectors --all
  packing-box setup packer
  packing-box setup detector peid
  packing-box setup analyzer gettyp
  packing-box test packer upx ezuri midgetpack
  packing-box test -b unpacker upx
  packing-box workspace view
  packing-box workspace edit MyDataset/data.csv
The tool's help message provides a few interesting examples of possible actions.
Playing with datasets
A dedicated tool called dataset allows to manipulate datasets.
The following simple example creates a dataset called "test-pe-upx" consisting of 100 PE files (including 32-bits and 64-bits) from the source folders of Wine integrated in the box, balanced between not-packed and UPX-packed samples.
The following command lets us see some details of the newly created dataset (including some metadata and its statistics per size ranges for not-packed and packed samples):
Up to now, we have built a dataset that contains the samples. The next command will convert it to a fileless dataset, that is with the features computed. This has the advantages of precomputing the features and thus speeding up further processings like model training and drastically reducing the size of the dataset (especially useful when planning to exchange it with other researchers). But it has the disadvantage to remove the files, therefore making the dataset unusable with integrated detectors or even preventing from feature modifications.
Playing with models
A dedicated tool called model allows to manipulate models.
The following simple example trains a Random Forest on a reference dataset called "test-pe-upx".
Once trained, the model receives an auto-generated name that includes the name of the reference dataset, the executable formats it applies to, the number of samples from the reference dataset, the training algorithm and the number of considered features. In order to find back this name, the list command can be used to display all the existing models:
Let us assume that the newly trained model was named test-pe-upx_pe32-pe64_100_rf_f111, we can show its details (including metadata) by using the following command:
If we want to test it against whatever dataset we want, we can use the following command (here, we test on the reference dataset itself):